Add a Manifest
After creating a plugin, the next step is to add a Manifest. A manifest contains important configuration details that tell the system how to communicate with the API you’re integrating.
A form appears with the following fields:
- Schema Version: Define the schema version for your plugin.
- Base URL: Enter the base URL of the official website or API you are connecting with. (For example, if you are creating a plugin for Github, use Github’s official API base URL.https://docs.github.com/en/rest/repos/repos)
- Version: Specify the version of the API.
- Type: Select the type of communication. You can choose HTTP or gRPC, depending on how the API works.

- Tags: Add tags to help identify or categorize your plugin.
- Once all fields are filled, click on the Submit button.
- Your manifest will now be added to the plugin.

Manage Your Manifest
After adding the manifest, you can view or update it at any time.
- Open your Plugin and go to the Event page.
- Click on the Settings button (⚙️).
- To view the manifest, click View Manifest.
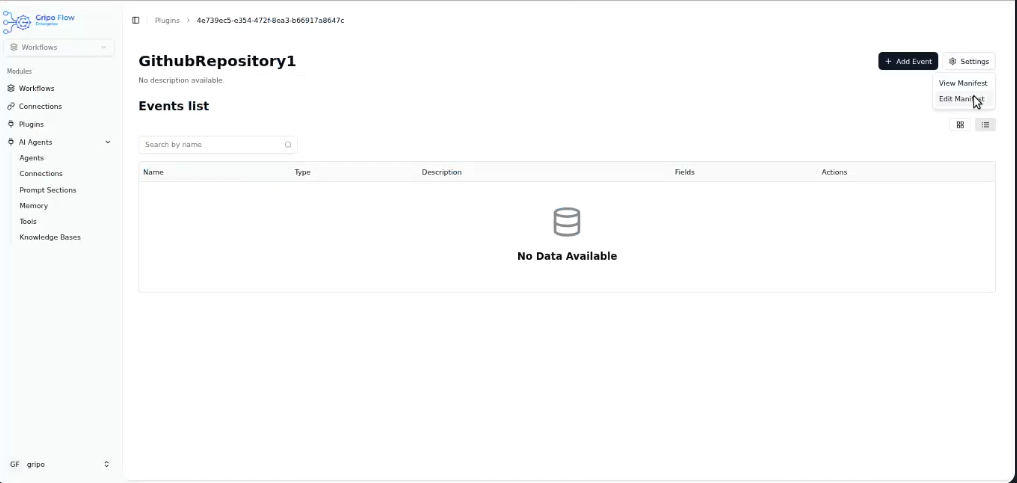
- You’ll see all the details of the manifest you created.

- To update the manifest, click Update Manifest.
- The manifest will appear in JSON format.
- Make your required changes and click Update.

The manifest will now be updated successfully.
- You can add event in your plugin