Quick Start
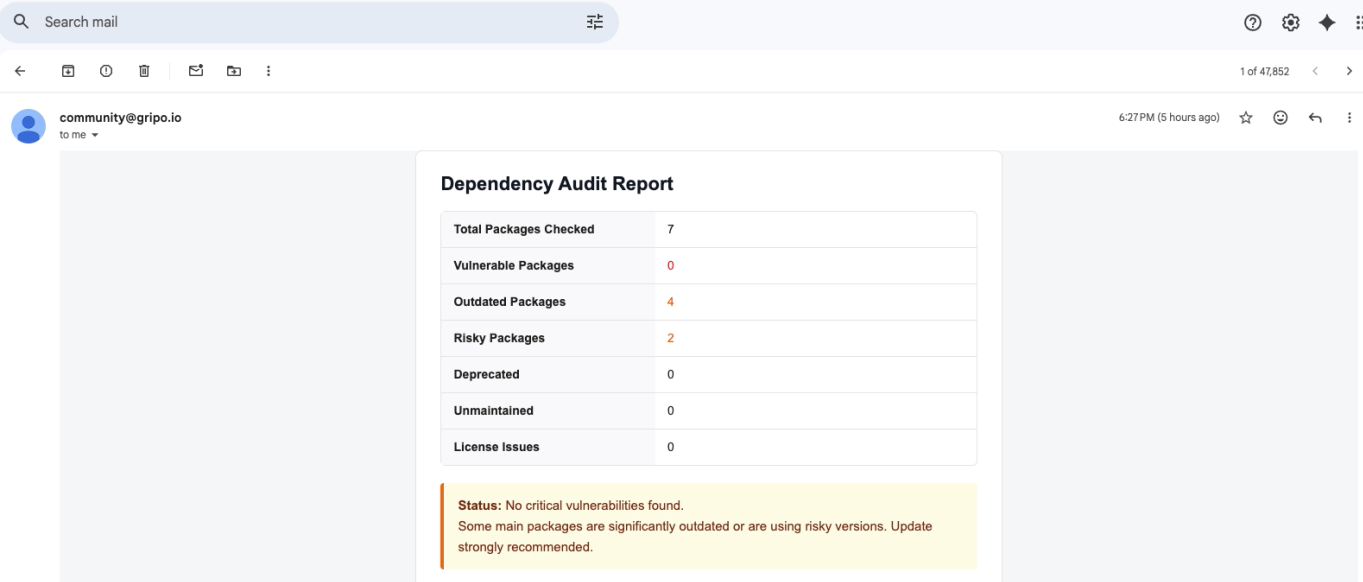
The best way to learn GripoFlow is by building a workflow. In this Quick Start, you’ll create an automated dependency scanning workflow that retrieves JavaScript packages from a GitHub repository, scans them for vulnerabilities, generates a security report, and automatically sends the report by email.
This example introduces the key concepts you’ll use when building workflows in GripoFlow, including workflows, sandboxes, nodes, and workflow execution.
Watch the complete walkthrough before following the steps below.
Workflow Overview
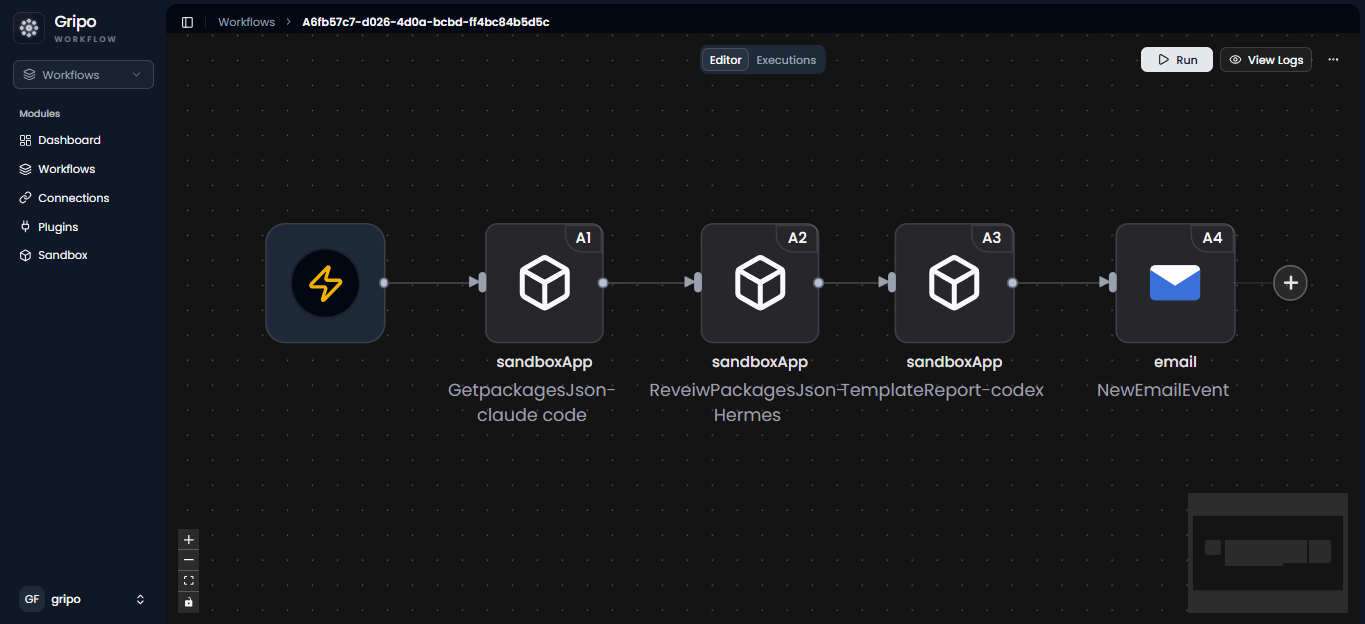
This workflow contains five nodes that work together to automate dependency scanning.
| Node | Description |
|---|---|
| Manual Trigger | Starts the workflow manually. |
| Get Packages JSON | Retrieves all project dependencies from the GitHub repository. |
| Review Packages JSON | Scans the packages and identifies known vulnerabilities. |
| Template Report | Generates a formatted dependency audit report. |
| Sends the generated report to the specified recipient. |
Step 1: Create a Workflow
- Open Workflows from the navigation menu.
- To create a new workflow, click on the Create Workflow button.
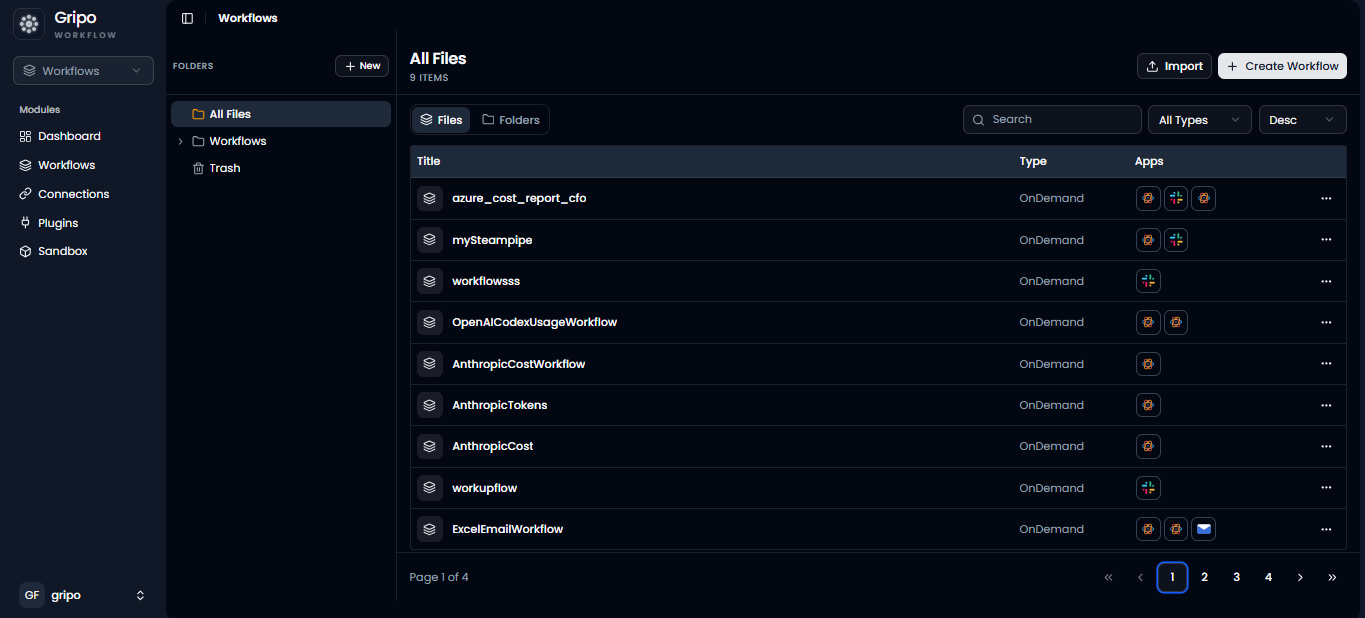
- In the first step of creating a workflow, you need to provide basic information such as:
Name : Enter a unique name for your workflow.
Description : Add a short explanation of what the workflow does.
Type : Select the workflow type from the available options.
Retry : Define how many times a failed step should be retried.
Tags : Add relevant tags to help categorize and filter workflows.
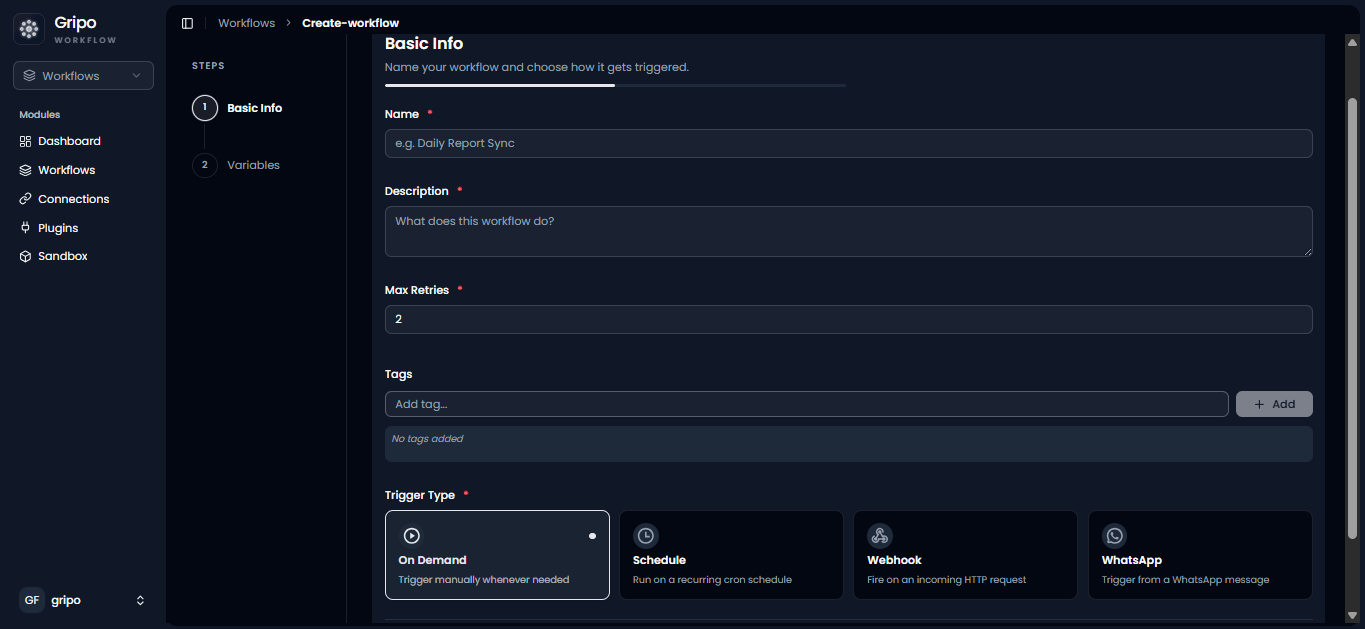
- You can create different types of workflows based on your needs :
On Demand : Runs when you start it manually.
On Schedule : Runs automatically at set times
Webhook : Starts when a specific event happens.
WhatsApp : Runs when triggered through a WhatsApp message.
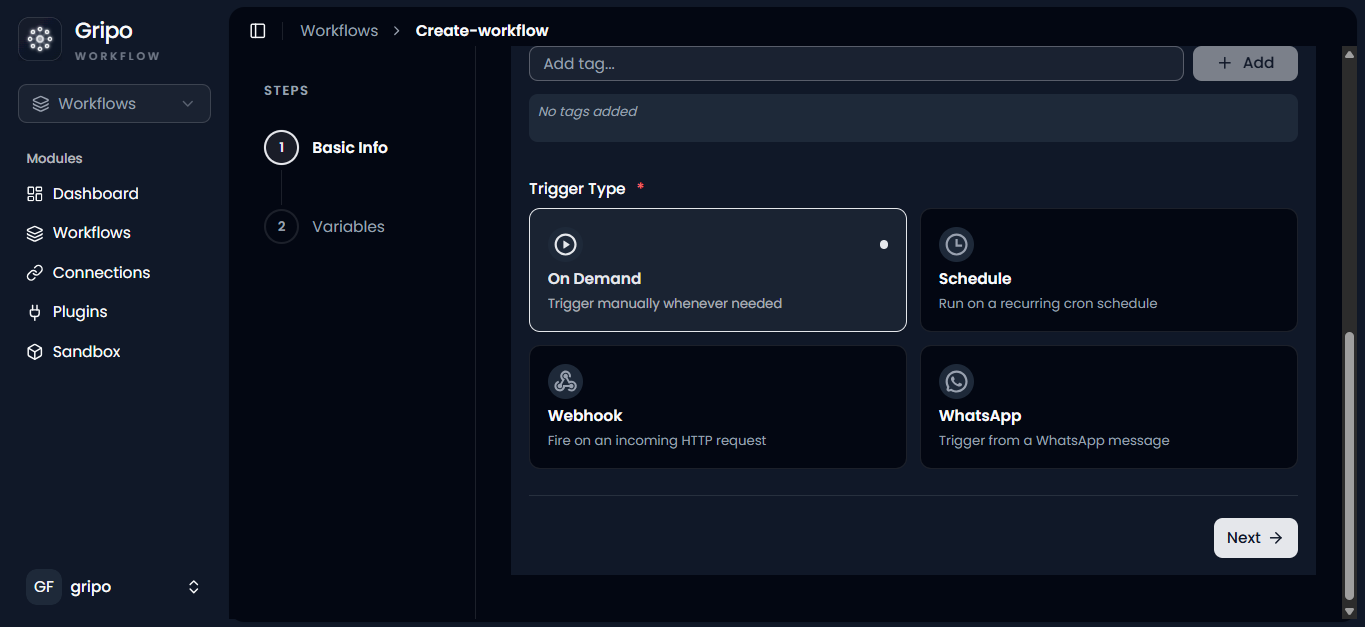
- After filling in all the required fields, Click on Next to move to the second step.
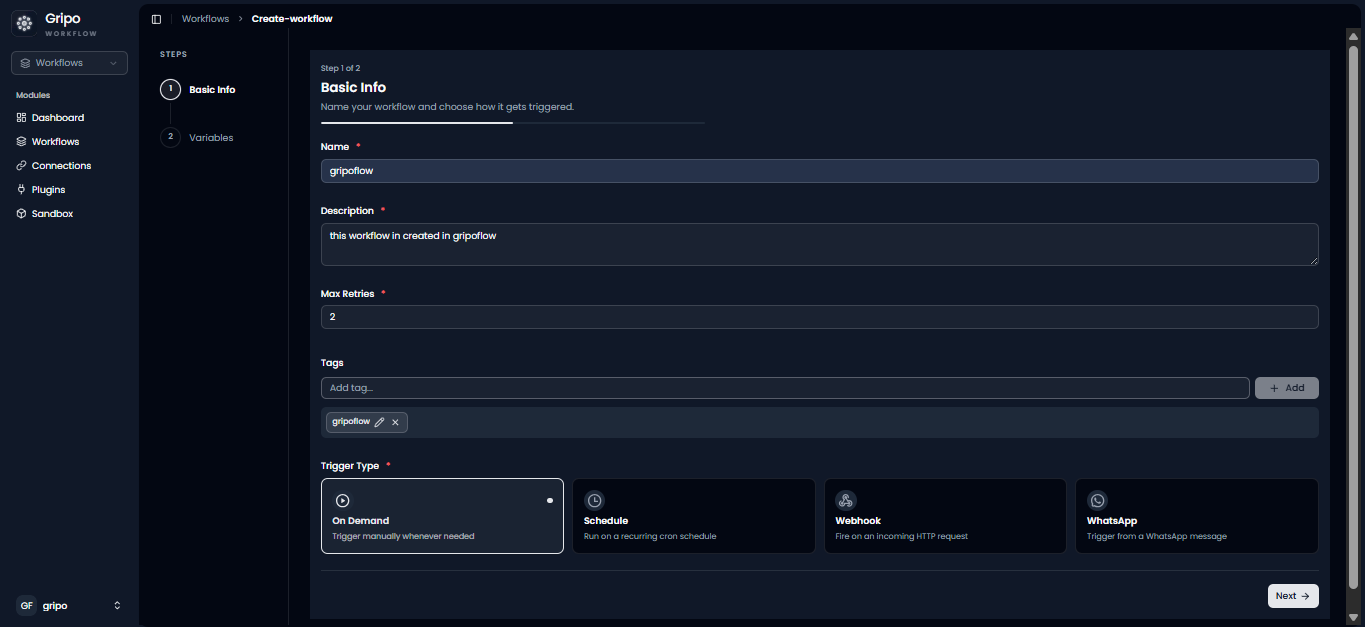
- In the second step, add Variables and their Values.
- You can add as many variables as needed by clicking Add More Variable.
- If you don’t want to add any variables, click Submit Workflow to move ahead.
- If you’ve added variables, click Submit Workflow Continue to proceed.
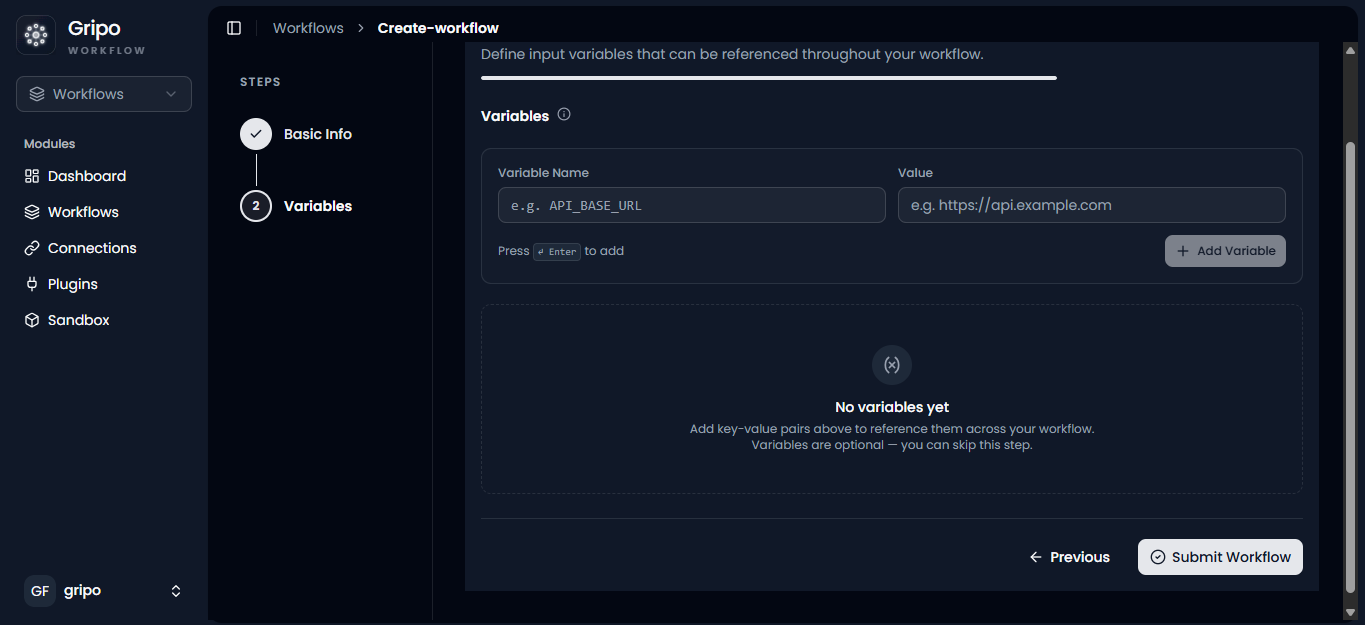
- A confirmation popup will appear, indicating that your workflow has been successfully created.
Step 2 : Create the Required Sandboxes
This workflow uses multiple sandboxes, each responsible for a specific task.
| Sandbox | Purpose |
|---|---|
| Get Packages JSON Sandbox | Retrieves package data from the target GitHub repository. |
| Review Packages Sandbox | Reviews the retrieved packages for known npm vulnerabilities. |
| Template Packages Sandbox | Converts the collected results into a structured report. |
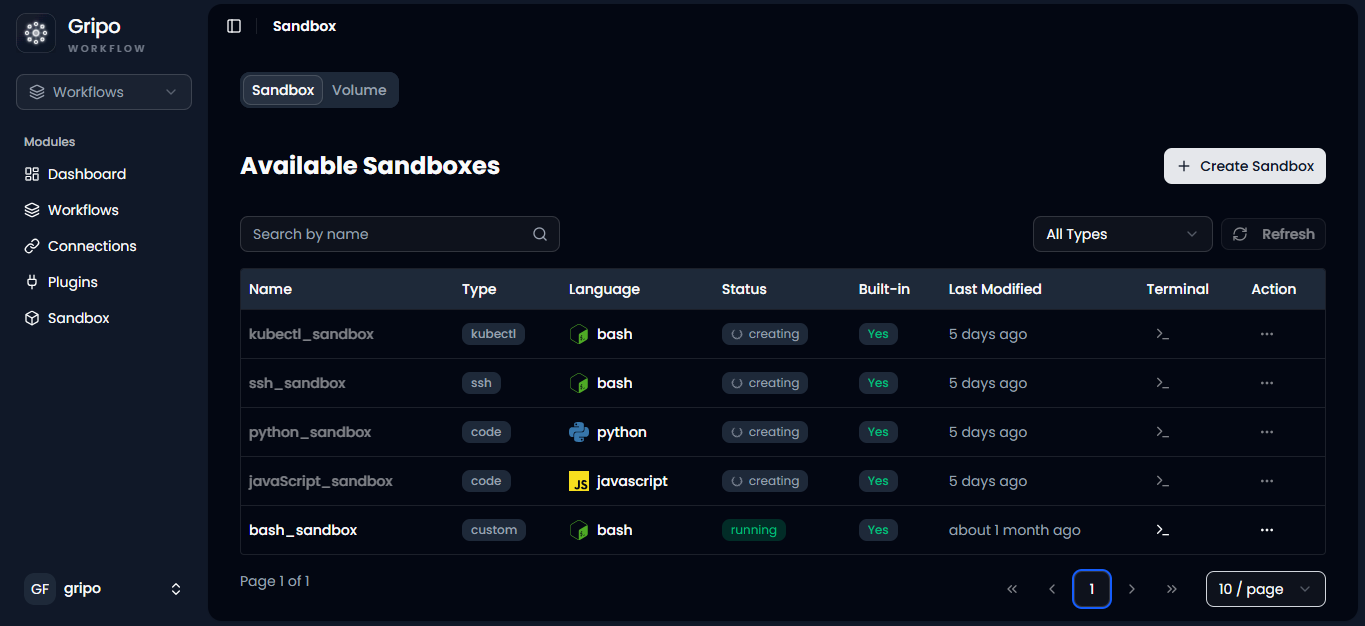
- Navigate to the Sandbox tab from the main menu.
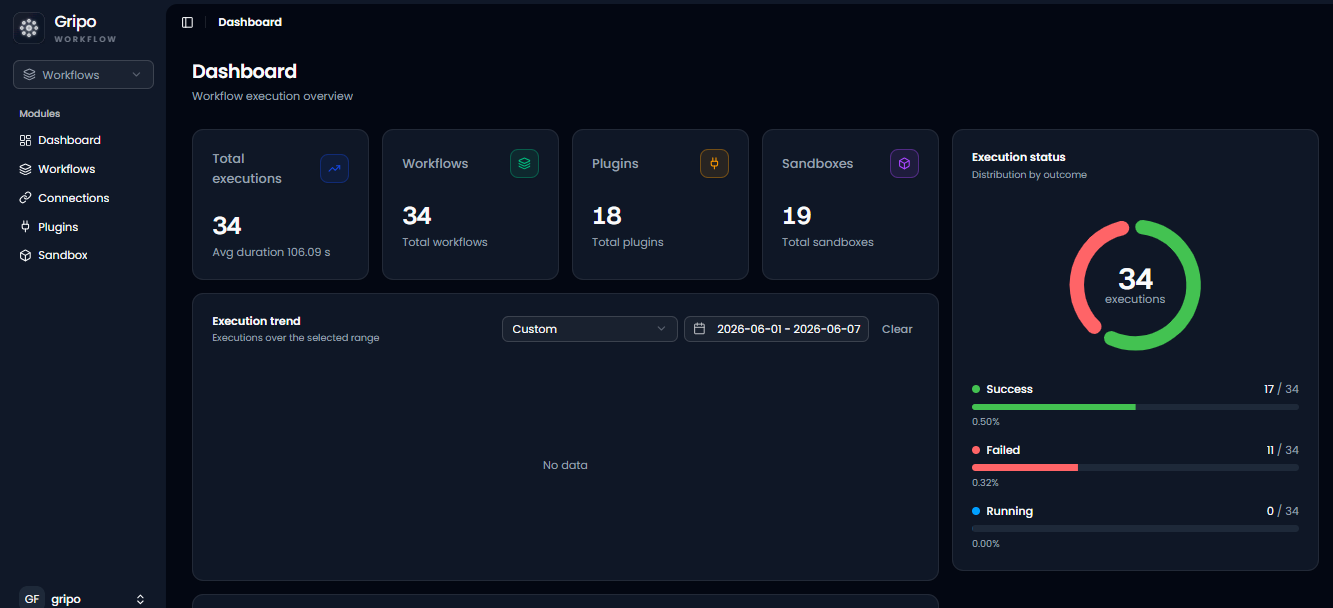
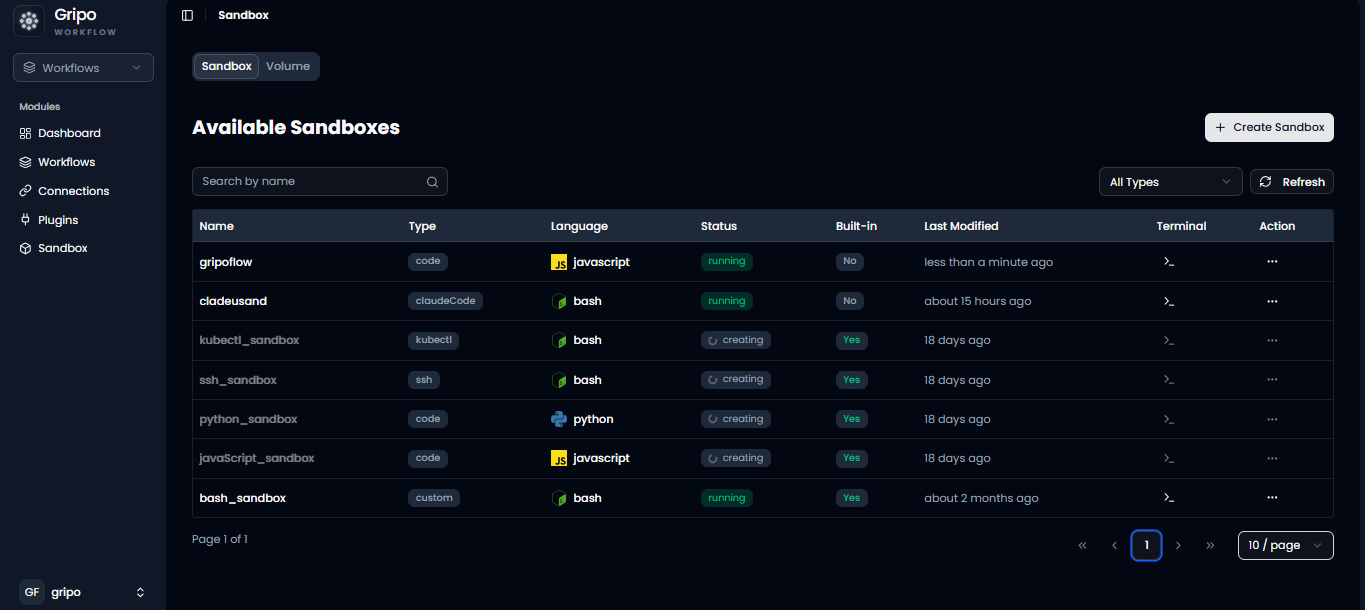
- On clicking Sandbox, a window will appear displaying a list of all existing sandbox.
- To create a new sandbox, click on the Create Sandbox button.
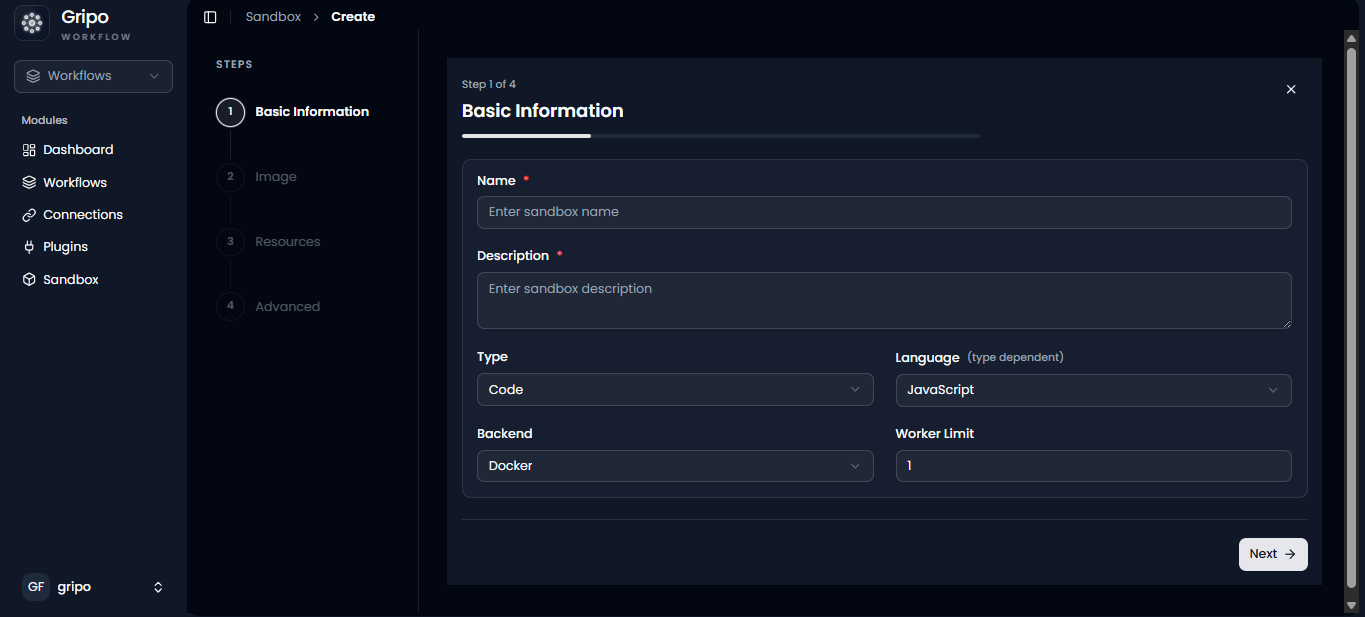
- The first step in creating a sandbox is to provide the basic information required to set up your environment.
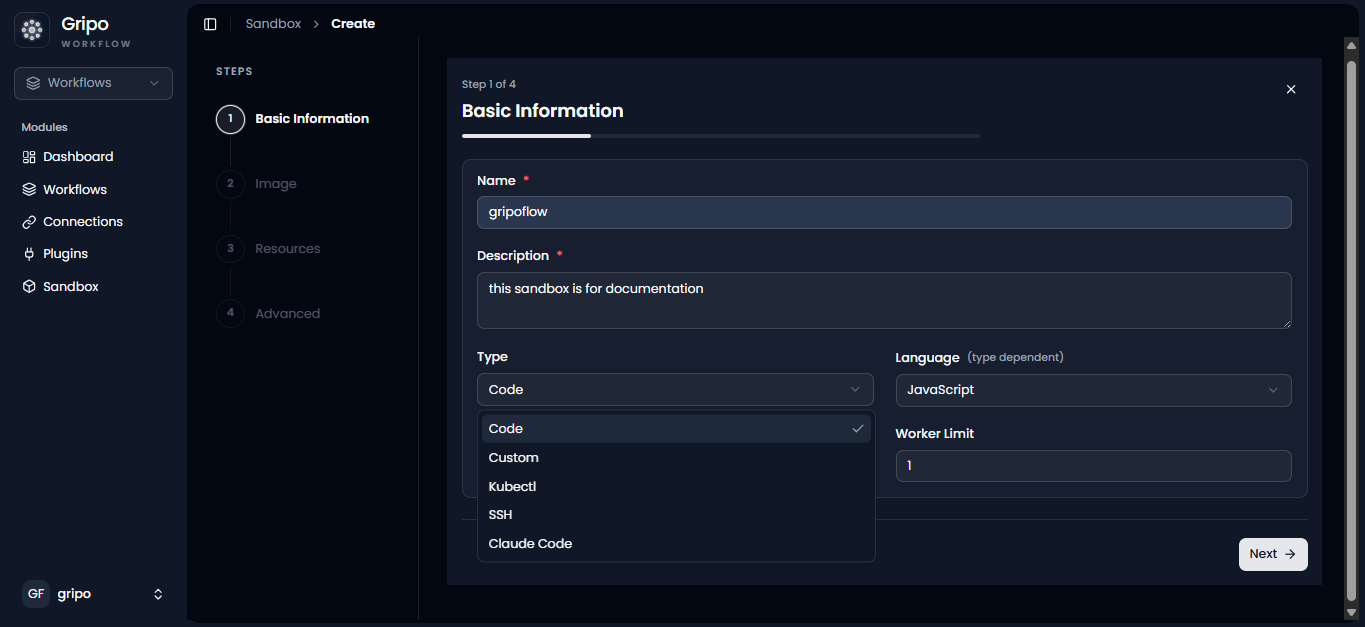
- This includes entering a unique Name, adding a clear Description, selecting the appropriate Type, choosing the Language, and defining the Backend Worker Unit that will handle execution.
- In the Type field, select Custom
- After filling in all the required details, click on the Next button to proceed to the next step of sandbox configuration.
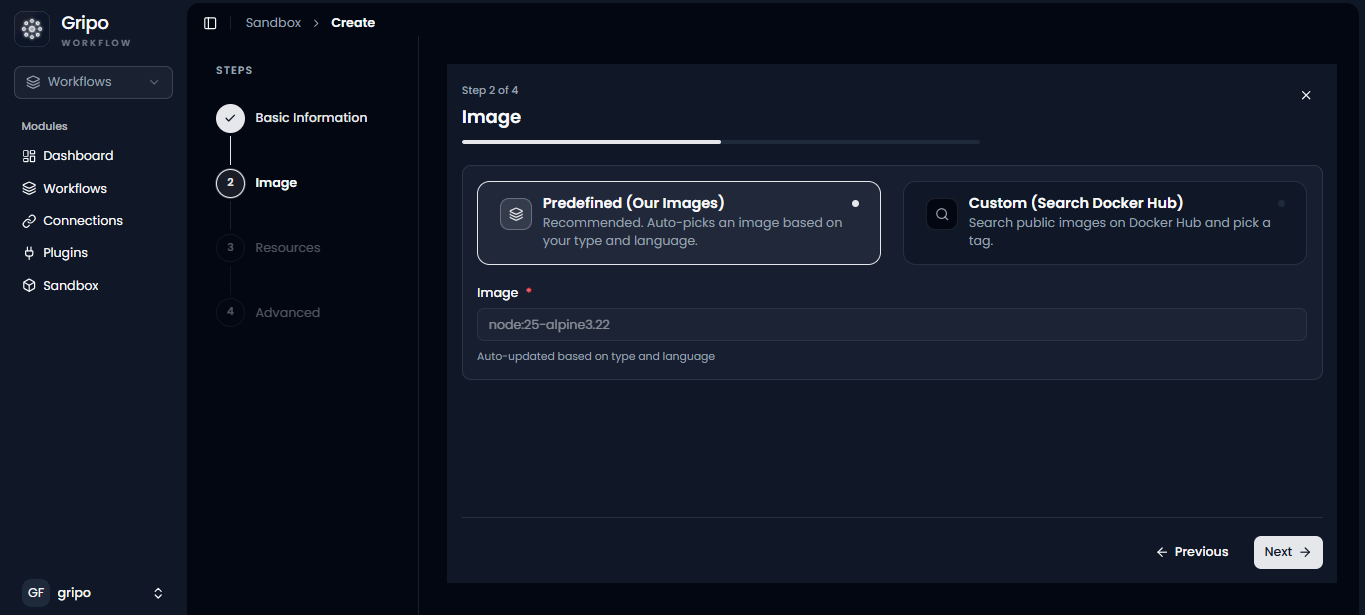
- On the second step, Image Configuration, you need to choose the environment image for your sandbox. You can either select a predefined image provided by GRiPOFlow or use a custom image from Docker Hub based on your requirements.
- After selecting the image, click on the Next button to proceed to Step 3.
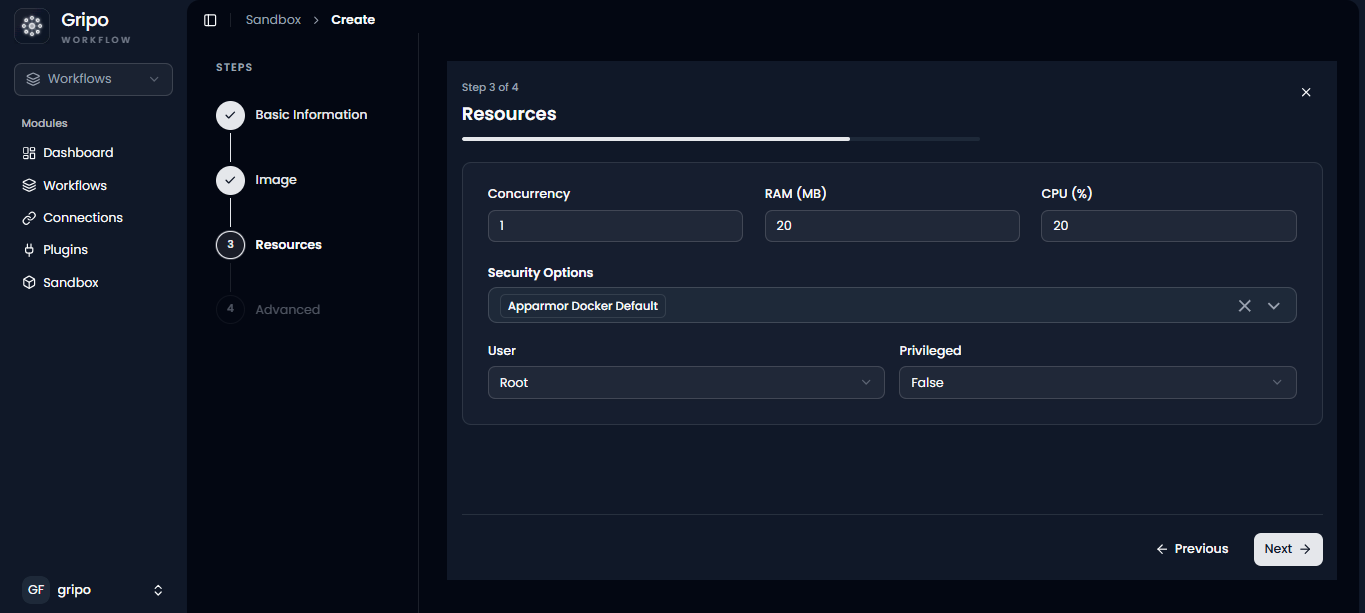
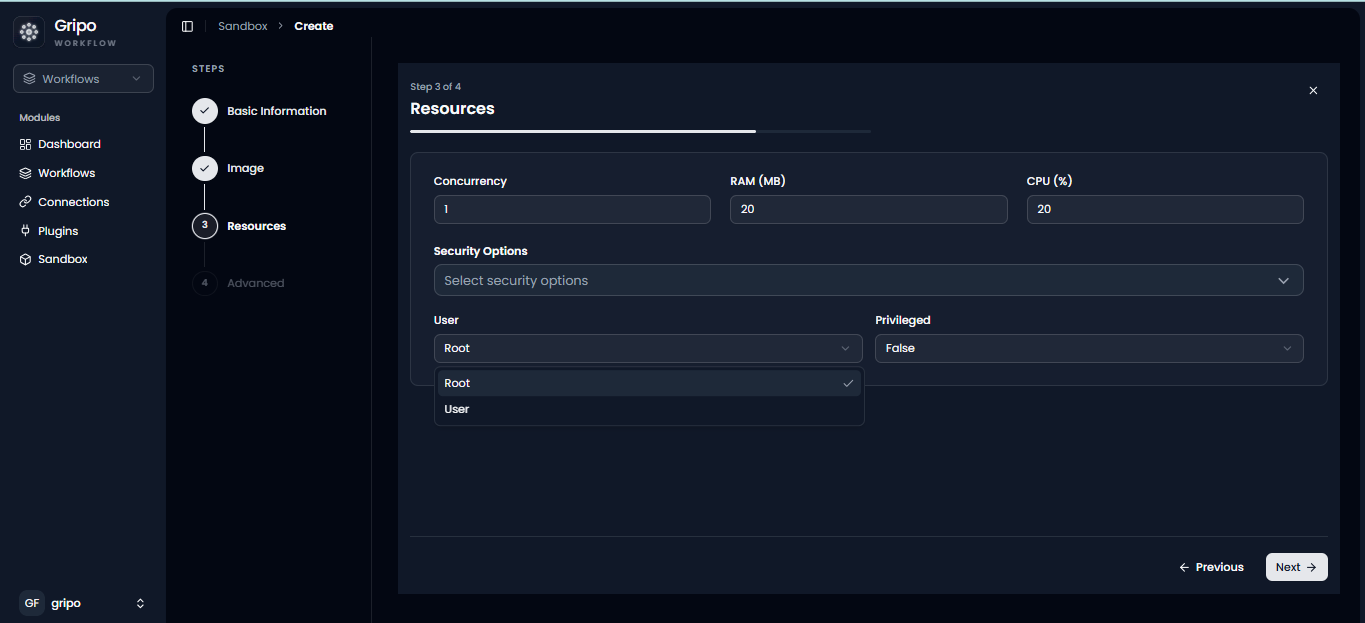
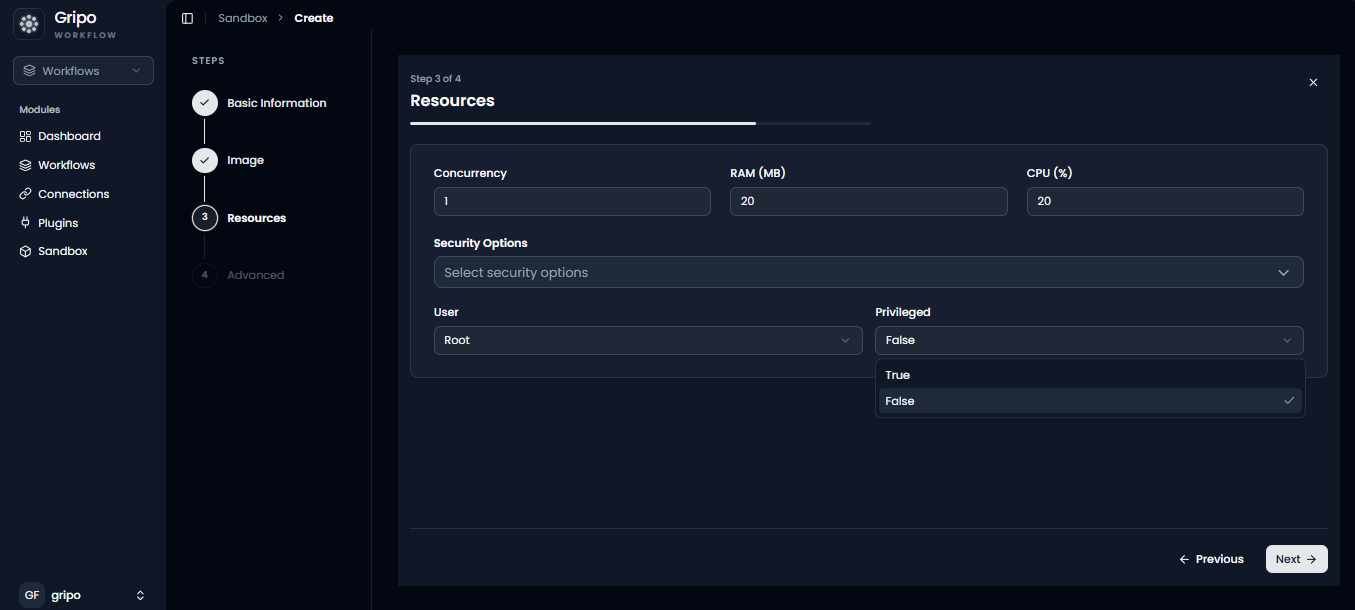
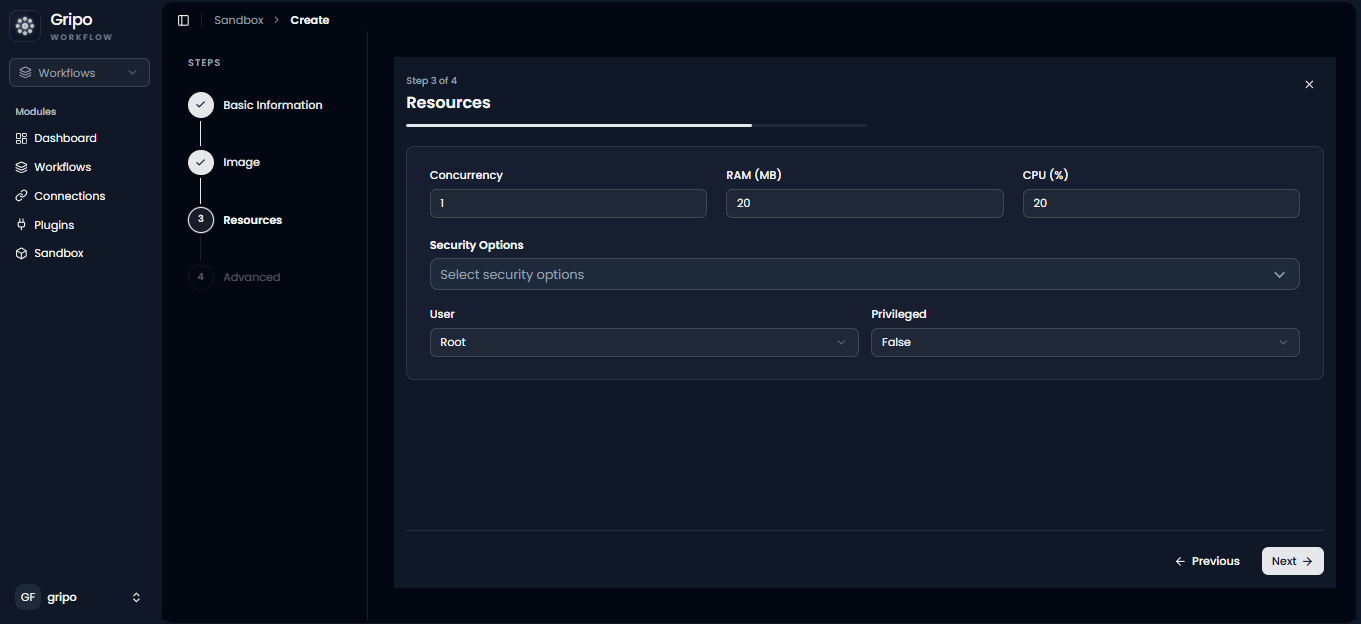
- The third step is Resources. In this step, you can configure system limits such as CPU, RAM, and concurrency based on your application needs.
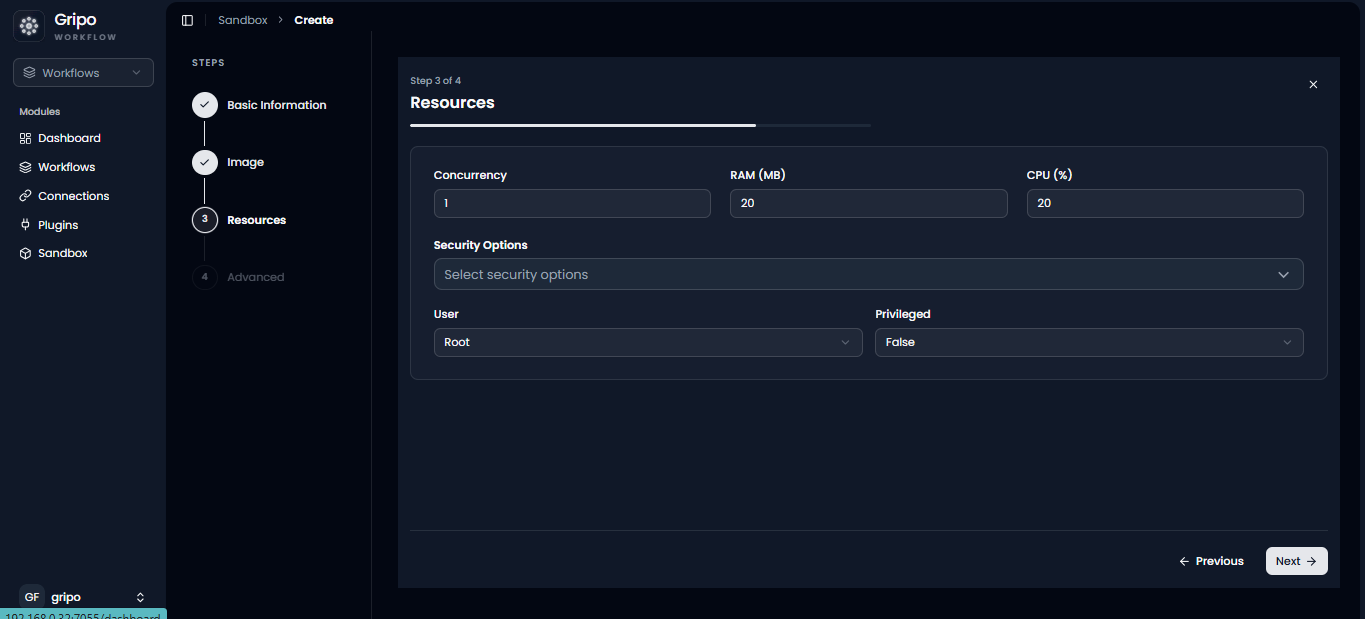
- Under the Security option, you can choose Apparmor Docker Default from the dropdown menu.
- In the User field, select root
- Then, in the Privileged option, choose true or false as needed.
- After completing all settings, click the Next button to proceed.
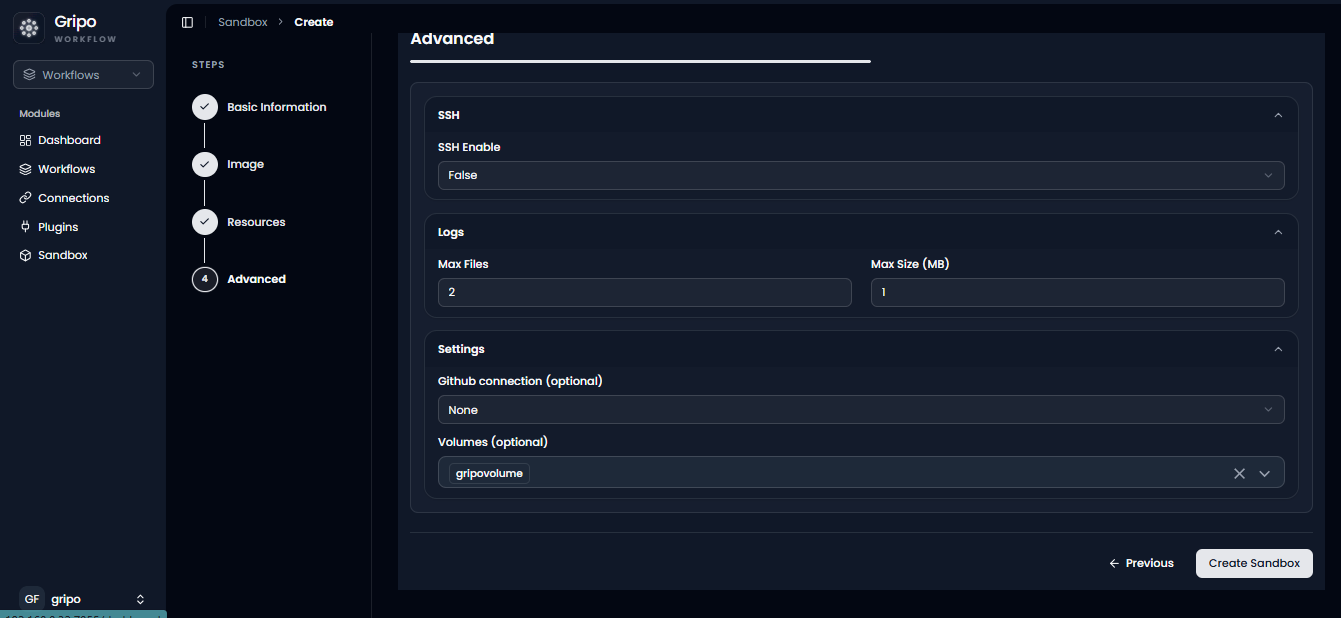
- The last step is Advanced Settings, where you need to fill in fields such as SSH, Logs, GitHub connection (optional), and Volume.
- To select a volume, you must first create one.
- After completing these fields and selecting the volume, click the Create Sandbox button, and your sandbox will be successfully created.
- Created sand box is visible in the list
Create the Remaining Sandboxes
Similarly, create the following two sandboxes, which are used throughout this workflow.
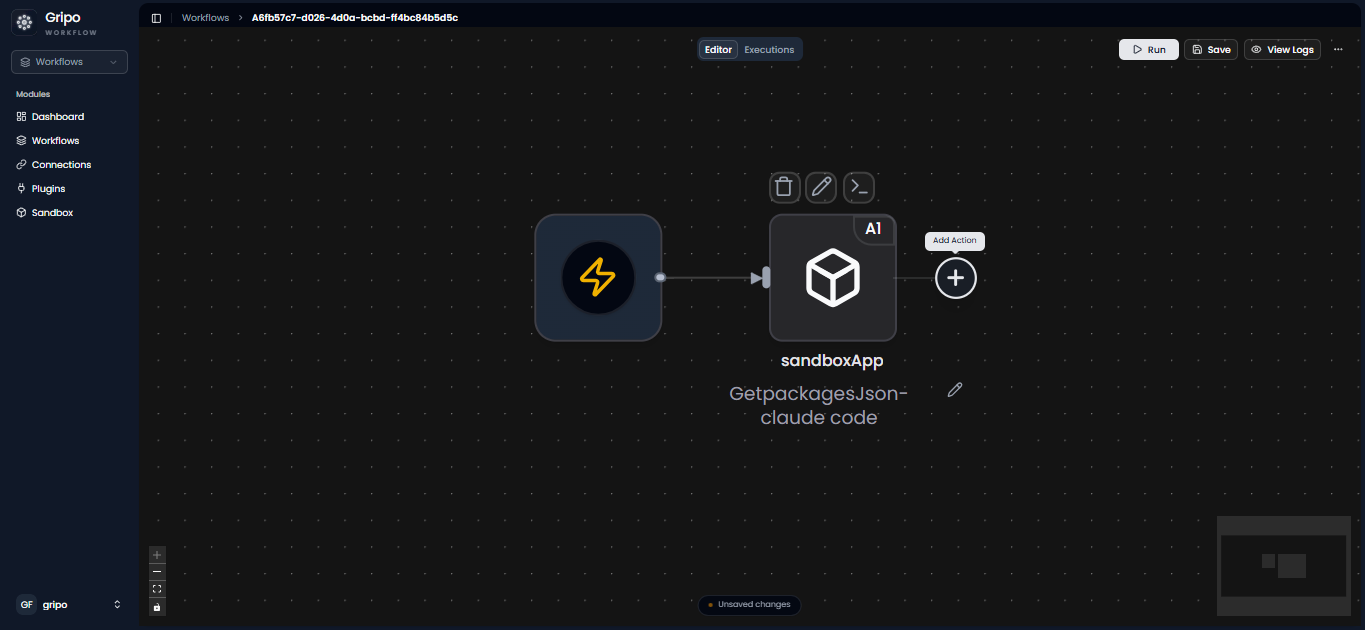
Step 3: Add the Get Packages JSON Sandbox
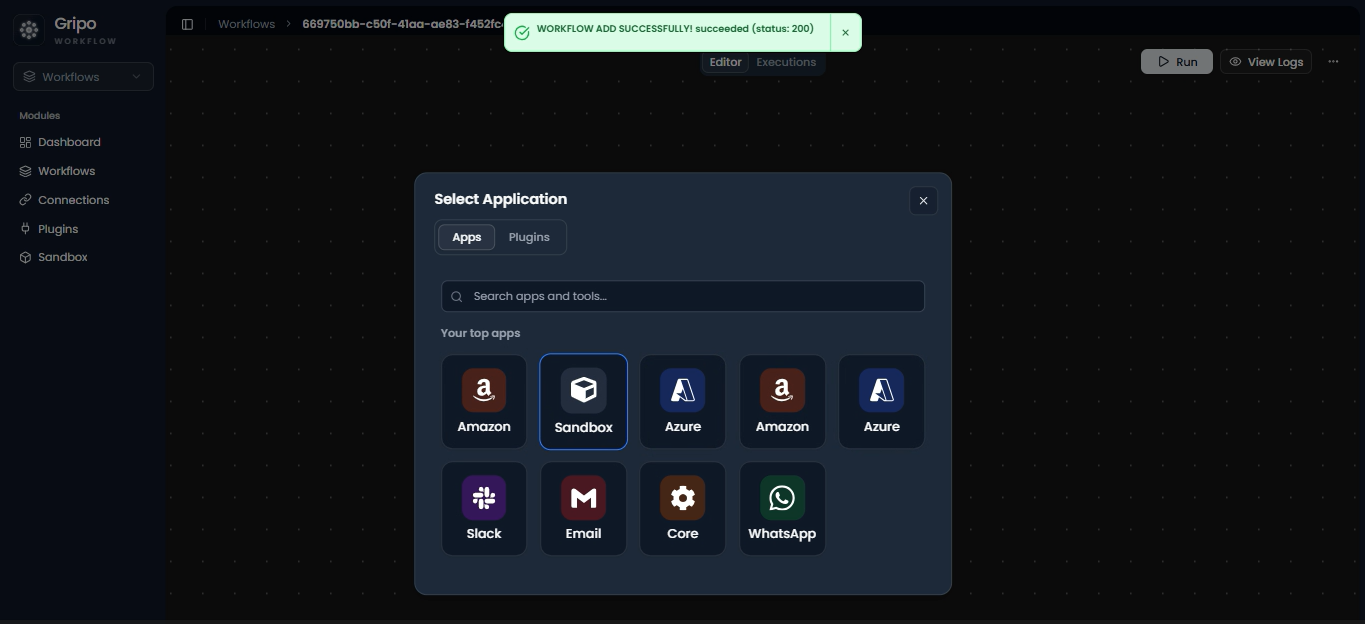
On the workflow canvas, click the + button to add a new node.
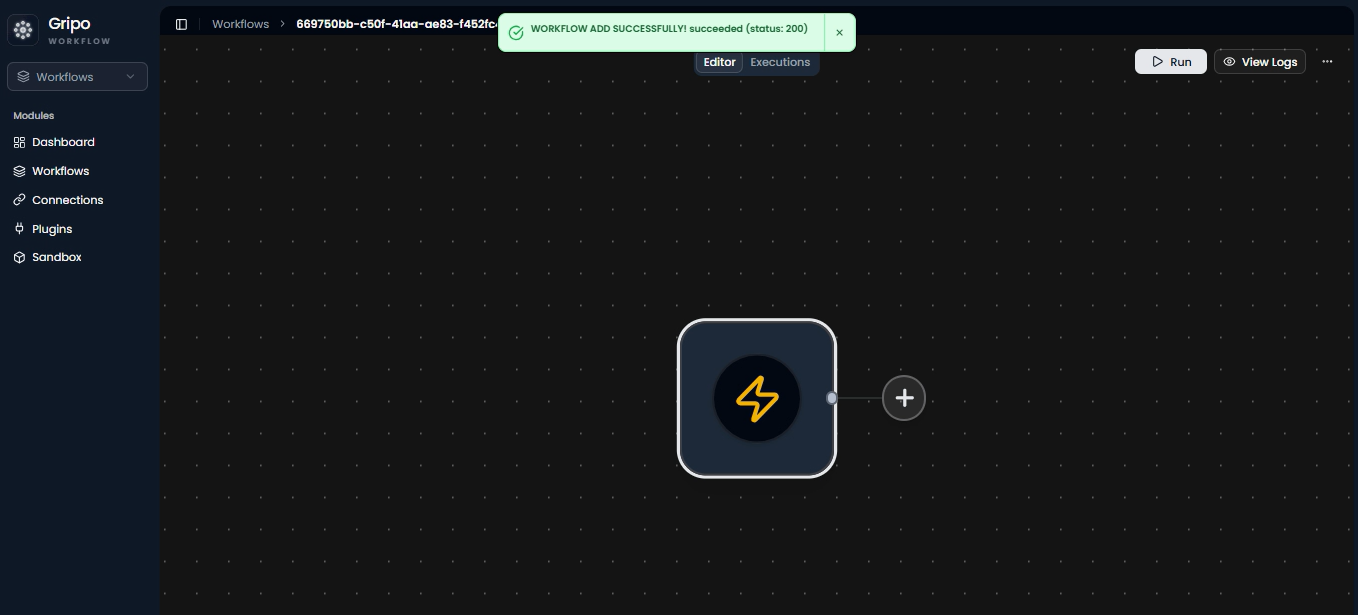
From the list, select Sandbox.
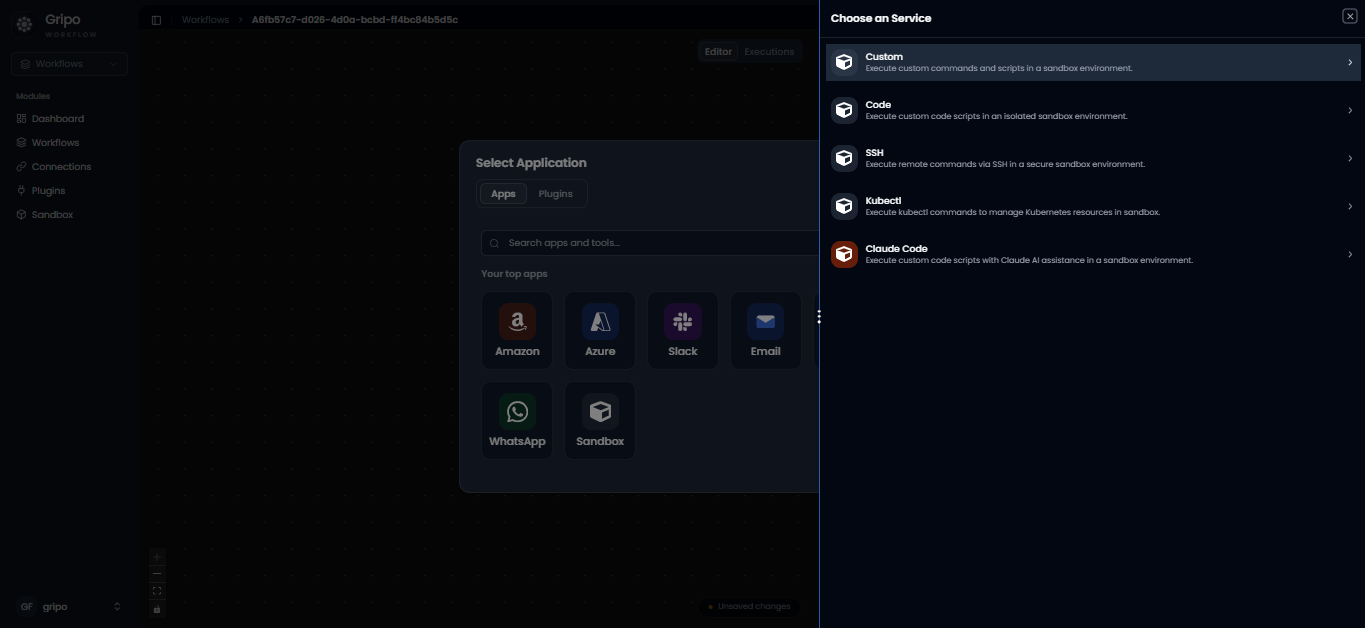
Select Custom from the list .
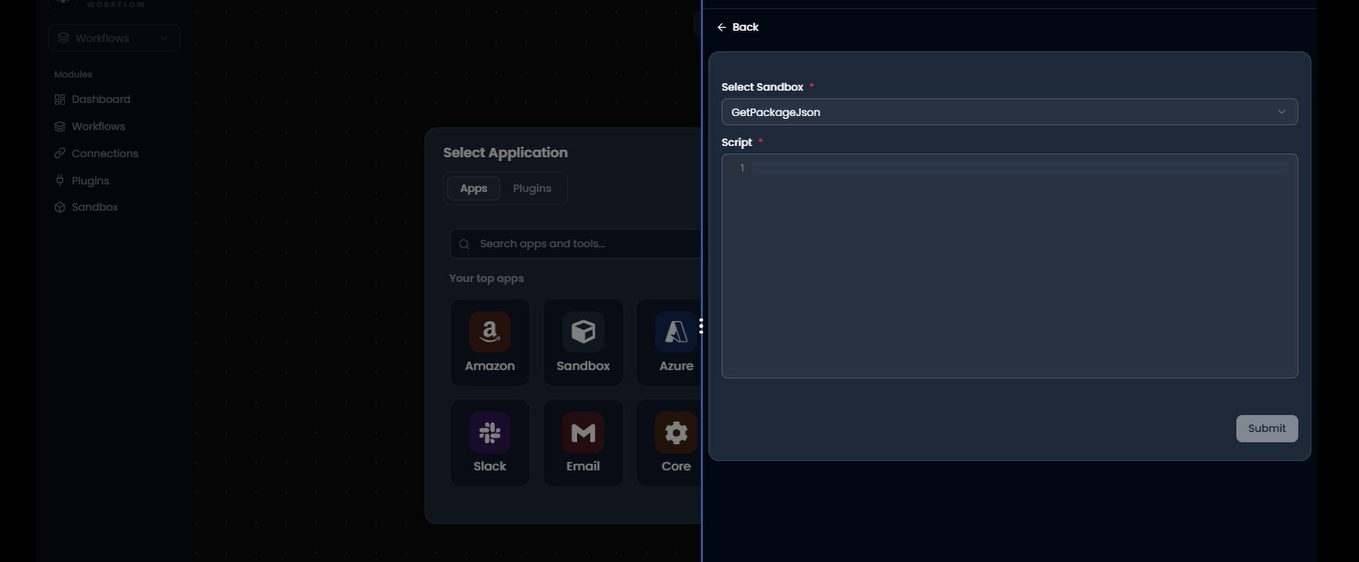
Select the Get Packages JSON sandbox.
In script field write JSON and click on submit button .
This sandbox retrieves the package.json information from your GitHub repository and prepares it for security analysis.
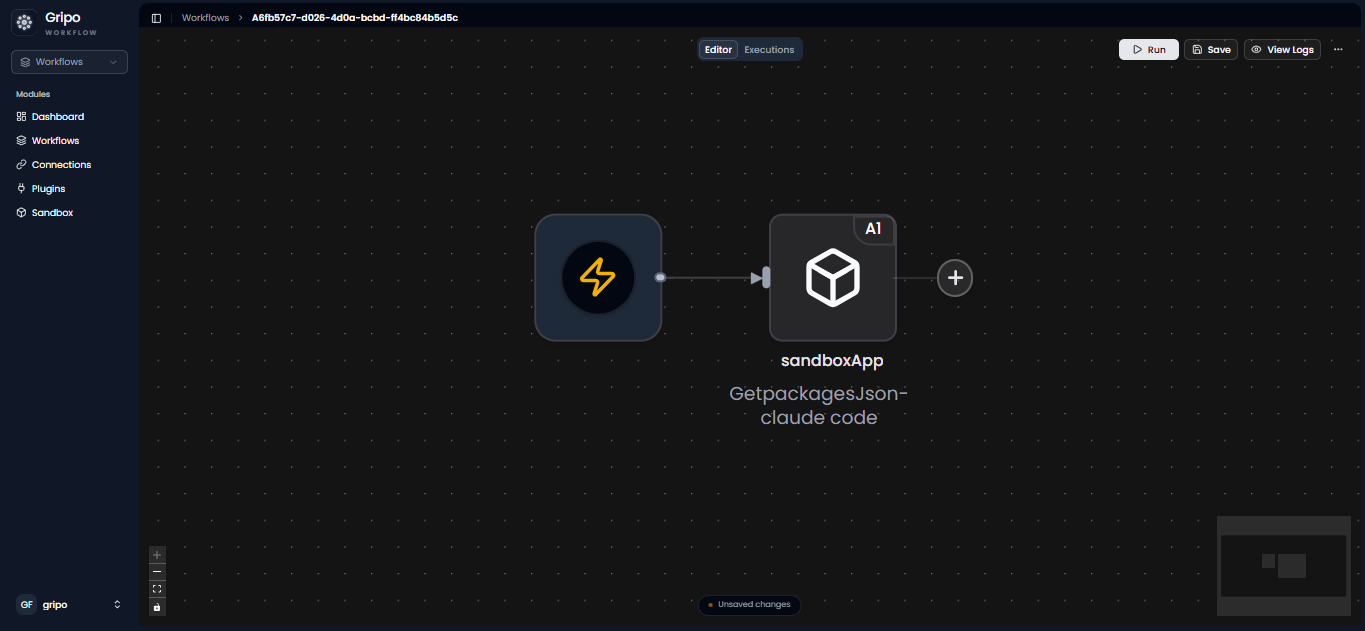
Step 4: Add the Review Packages JSON Sandbox
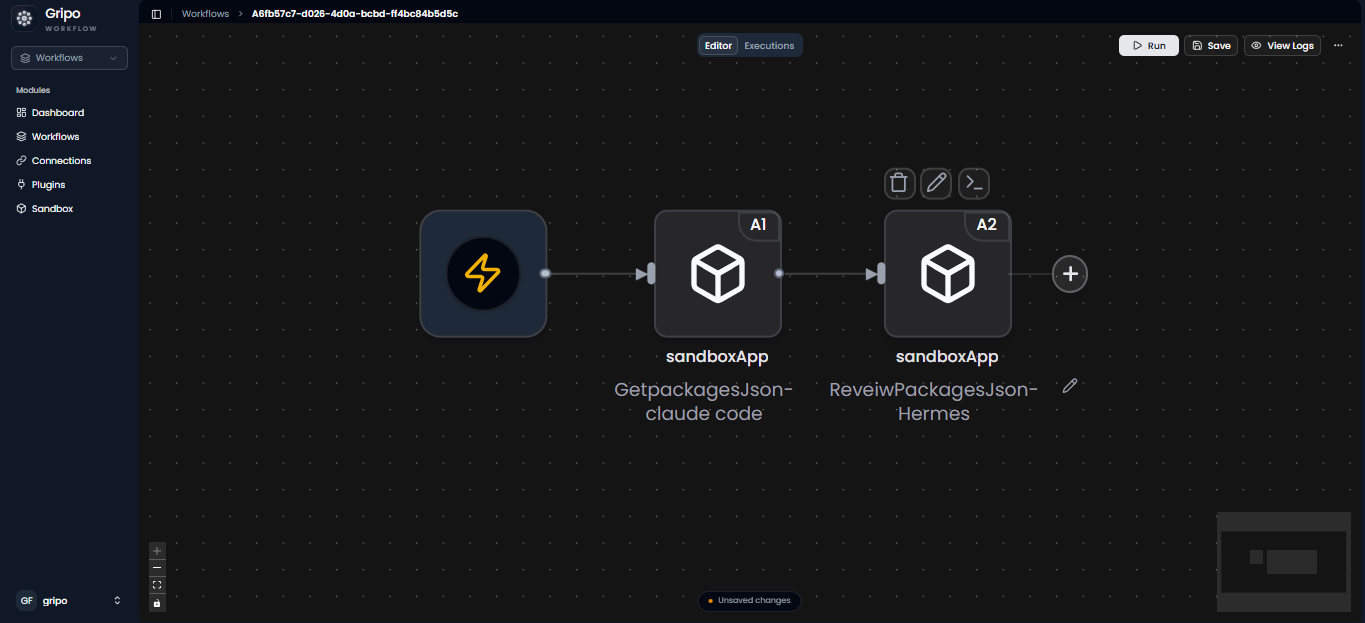
Add another Sandbox node by clicking the + button
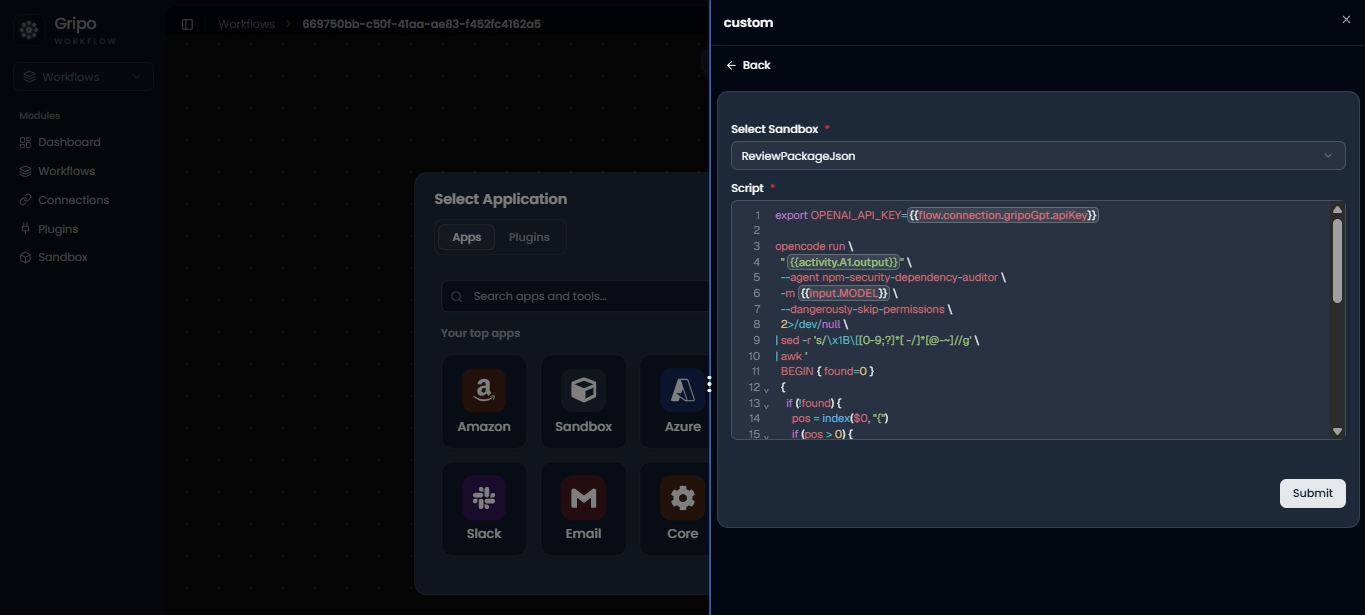
Select the Review Packages JSON sandbox and write some JSON in script field .
This sandbox scans each dependency and identifies known vulnerabilities.
Step 5: Add the Template Report Sandbox
Add another Sandbox node by clicking + Button.
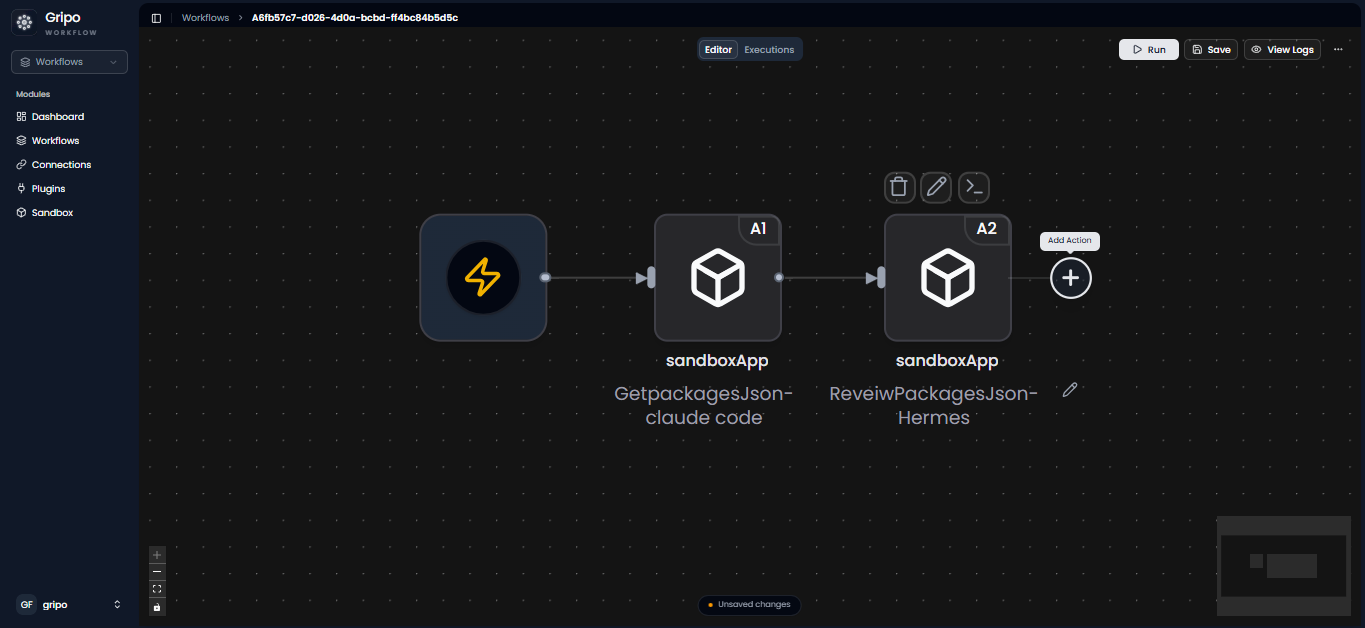
Select the Template Report sandbox and write the JSON
This sandbox converts the scan results into a structured report containing:
- Total dependencies scanned
- Vulnerable packages
- Vulnerability severity
- Security findings
- Recommended actions
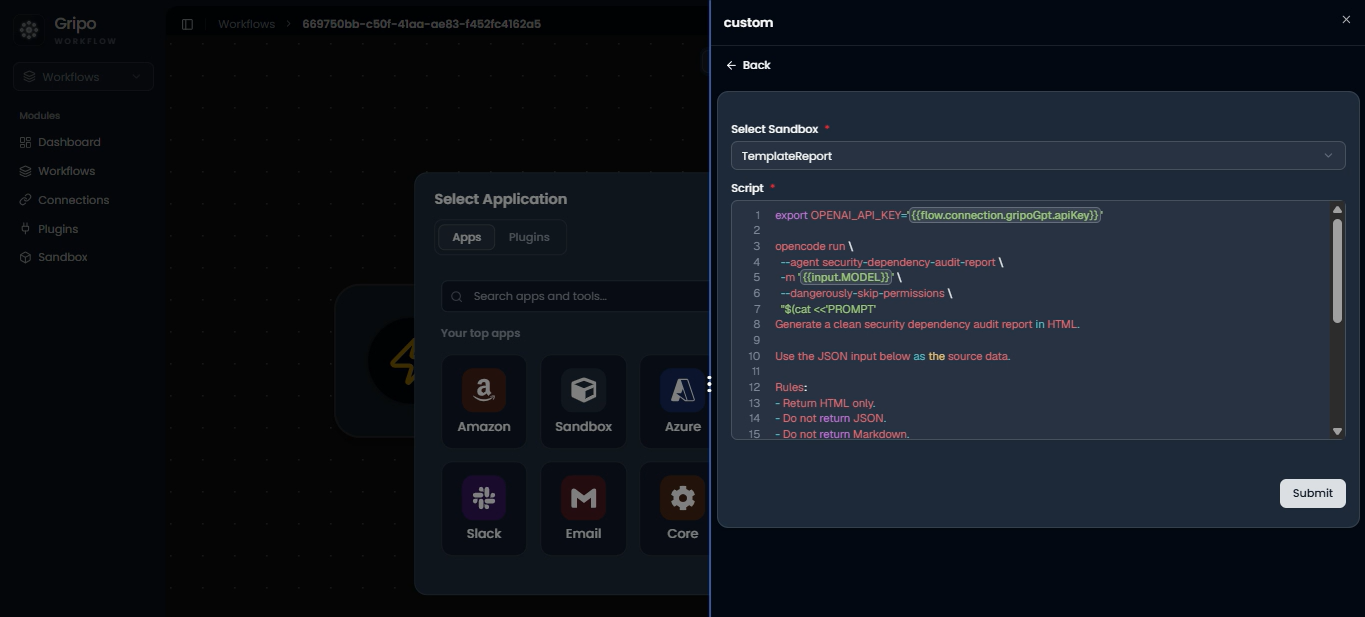
On click submit button this sandbox is connected with the workflow
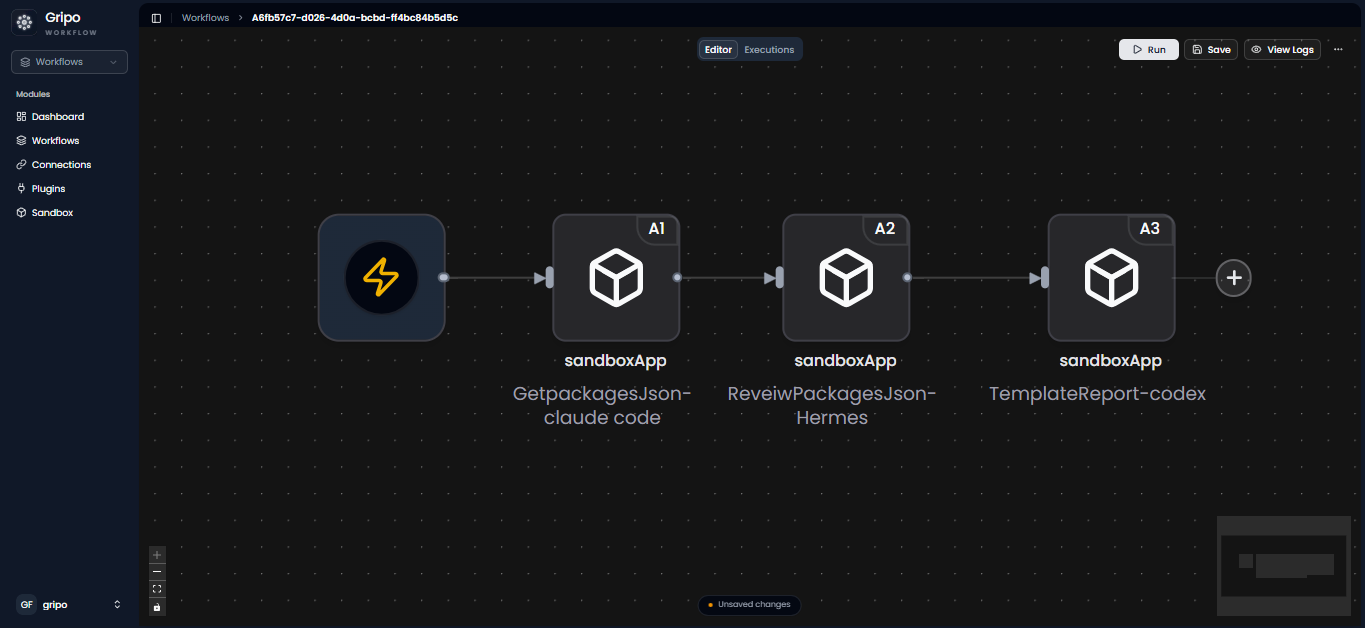
Step 6: Add the Email Node
Add an Email node to the workflow by clicking on + button .
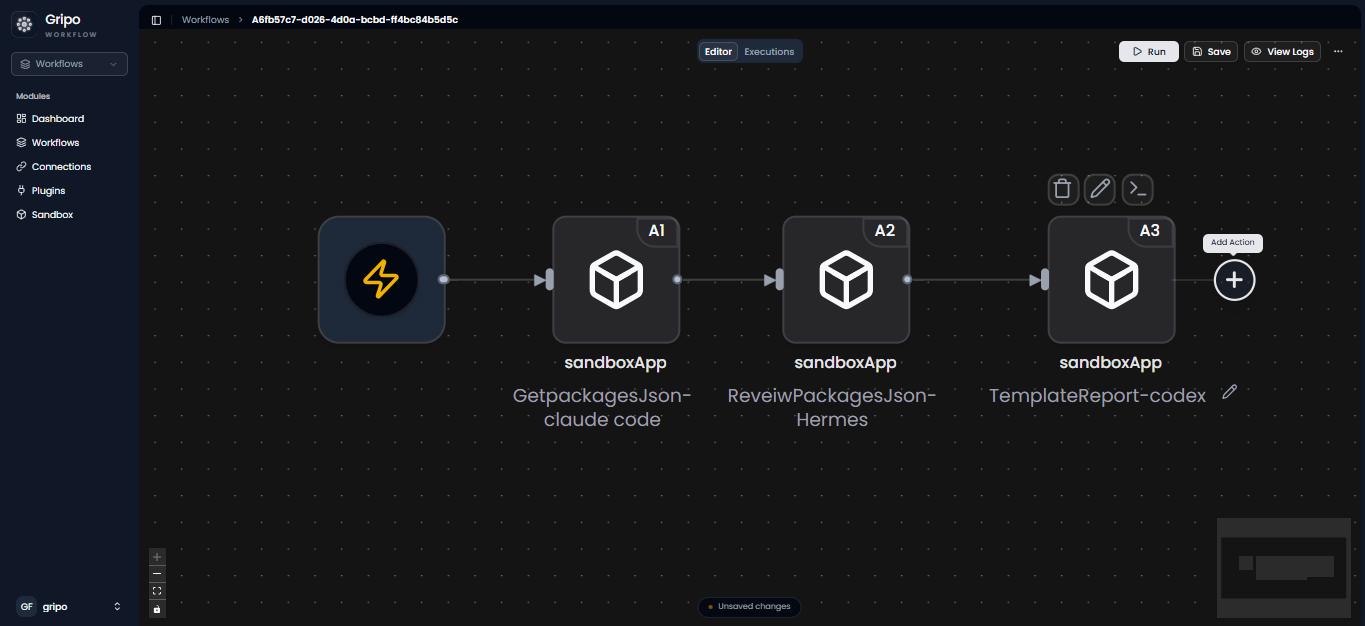
Select Email from the application list
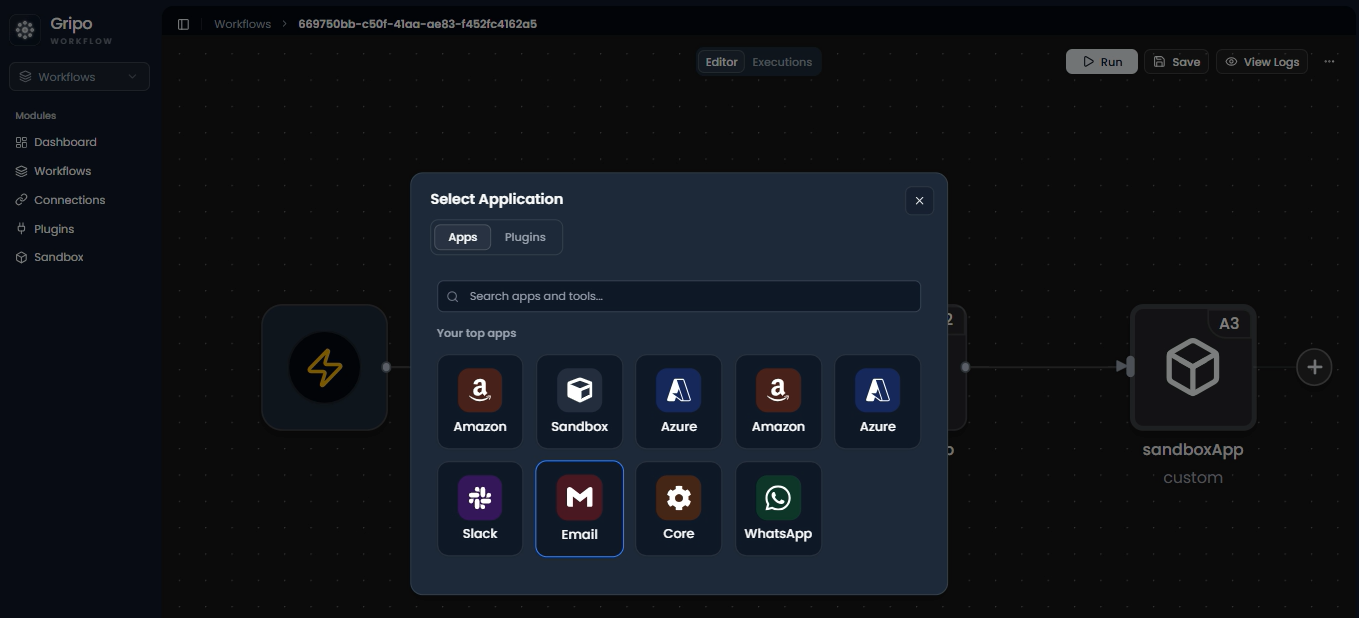
Configure the following fields:
- Recipient
- Subject
- Email Body
Use the output from the Template Report sandbox as the email content.
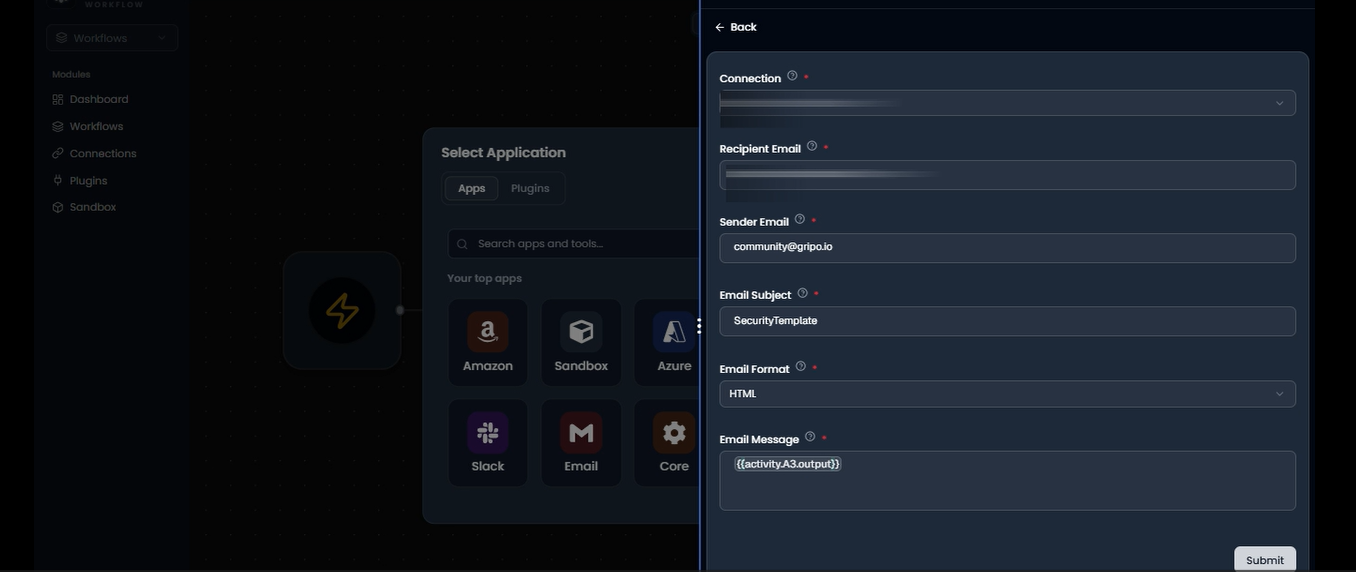
On click submit button this sandbox is connected with the Template Report sandbox.
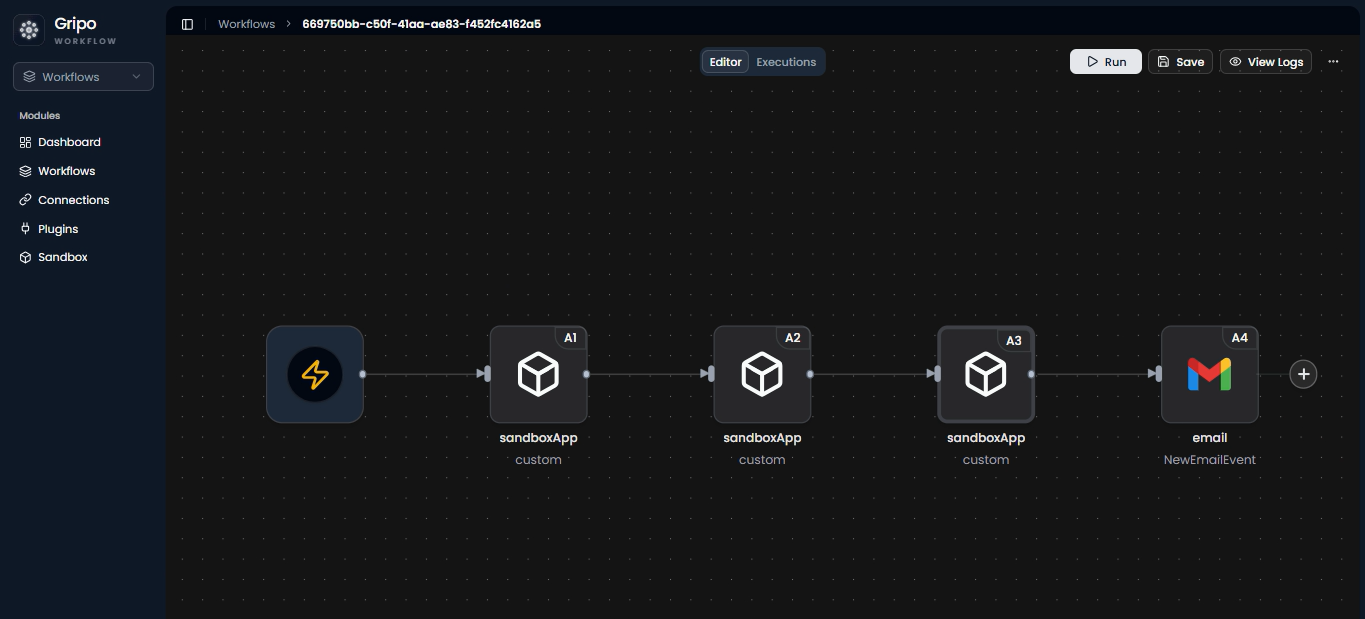
Step 7: Run the Workflow
Click Run to execute the workflow.
As the workflow runs, each node displays a green check mark to indicate successful execution.
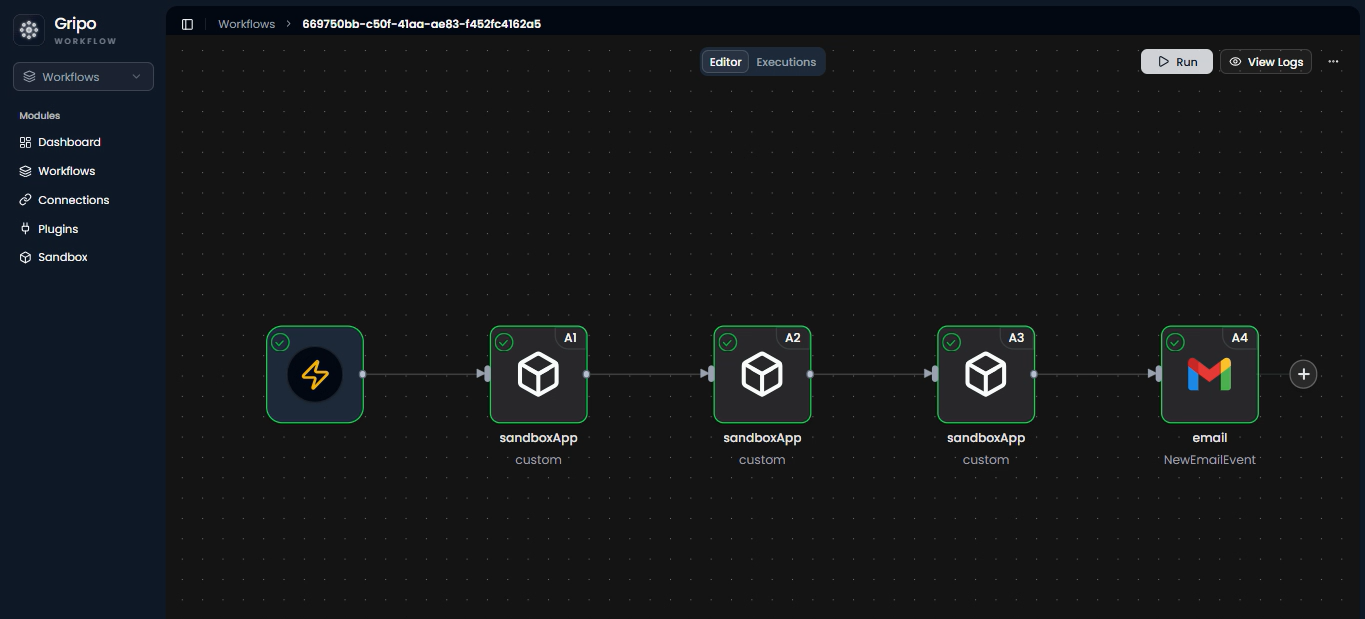
Verify the Results
After the workflow completes successfully:
- The project dependencies are retrieved from GitHub.
- The dependencies are scanned for vulnerabilities.
- A dependency audit report is generated.
- The report is automatically sent to the configured email address.
Open your inbox to verify that the report has been delivered successfully.